A PBX, or private branch exchange, intercom system can be an invaluable communication tool for businesses, schools, hospitals, warehouses, and other organizations. A PBX intercom allows efficient internal communication while also facilitating external calls. With some planning and elbow grease, you can set up your own PBX system to meet your organization’s unique needs. This comprehensive DIY guide covers everything you need to know.
Getting Familiar with PBX Systems
Before diving into the installation process, it helps to understand exactly what a PBX phone system is and why you may want one.
 A PBX system acts as a central hub connecting an organization’s internal phone network with external telephone lines. This allows for seamless communication between employees as well as with outside parties. Key capabilities typically include:
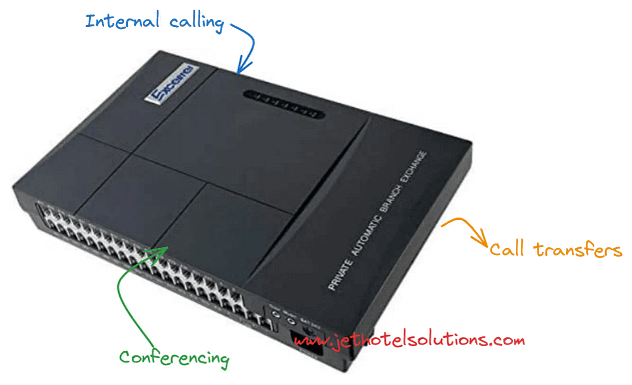
- Internal calling: Employees can call each other by simply dialing an extension number instead of an full 10-digit phone number.
- Call transfers: Calls can easily be transferred between extensions with the touch of a button.
- Conferencing: Multiple parties across different locations can join the same call.
- Automated attendants: Custom voice menus route callers to the appropriate extension without human intervention.
- Shared line access: Employees can join conversations or view held calls on shared department lines.
- Emergency notifications: Send important announcements to all endpoints instantly.
- Call monitoring: Administrators can listen in on calls for training/quality purposes.
- Installing your own on-premise PBX grants you full control – you’re not at the mercy of a third party provider. Maintenance and hardware costs are the main downsides. Still, for many organizations the benefits outweigh the costs.
PBX System Components
A basic PBX setup requires a few core hardware components connected to your existing internet and telephone infrastructure:
The PBX unit: This is the central processor tying the whole system together. Options range from small tabletop boxes to full server racks.
Telephone handsets: These connect to the PBX unit via VoIP (Voice over Internet Protocol). You can use regular analog phones, VoIP models, or a mix.
Trunk gateway: This device links PBX to external phone lines (Public Switched Telephone Network). Calls can flow bi-directionally.
Uninterruptible power supply (UPS): Grants peace of mind by providing backup electricity if the grid goes down.
Optional extras like auto-attendants, overhead paging systems, emergency panels, and door access mechanisms can be incorporated too. You’ll likely need additional wiring and networking hardware as well.
Six Steps to PBX Installation Success
With a general sense of PBX under your belt, let’s run through the installation process covering planning, setup, and testing. Expect the job to take around 2-3 days with 2+ people.
Step 1: Design Your System Architecture
Start by mapping out your organization’s desired PBX architecture on paper. This should cover:
Number of users/extensions needed
Types of phones being deployed and where
Locations of phones/wireless antennas that link to PBX
Trunking capacity requirements
Any auxiliary systems like overhead paging
Where the PBX unit and supplementary hardware will physically reside
Properly visualizing system architecture ensures all use cases are covered and infrastructure needs met.
 Step 2: Set Up the PBX Unit
With architecture mapped out, it’s time to configure the brains of the operation – the PBX unit. For most small-medium installs, this entails:
Unboxing the unit and physically racking/placing
Connecting to power sources (including UPS backup)
Connecting LAN cabling from PBX unit to network switch
Accessing the web management interface via connected PC
Configuring network settings like DHCP and static IPs
Setting up software like automatic attendants and call routing schemes
Refer to your specific PBX model’s installation manual for step-by-step guidance. For branch networks, repeat this process for any secondary PBX boxes.
Step 3: Connect Trunk Lines
External connectivity is next on the agenda. You’ll need to route telephone trunk lines into the PBX unit via the trunk gateway. Steps include:
Decide on PSTN trunk type – analog, digital, or SIP
Order trunk lines from your VoIP/telephony service provider
Run cabling from demarcation point to trunk gateway
Connect lines to gateway ports matched to your PBX
Configure gateway to detect and carry trunk channels
Register trunk accounts/SIP credentials on the PBX unit
Test making external calls
Adequate trunk capacity is crucial – a good rule of thumb is one line per three users as a minimum.
Step 4: Add Telephones
No phone system would be complete without the actual phones! The process for connecting handsets is straightforward:
For analog models, plug a phone cable from the PBX unit into the phone jack
For VoIP phones, connect the LAN port to a Power over Ethernet (PoE) switch
For wireless phones, connect antennas linked to PBX
Next, configure each phone by assigning extension numbers and registering devices on PBX. Ensure call quality testing takes place from every handset. Consider distributing quick reference guides with extension lists.
Step 5: Get Any Ancillary Equipment Set Up
supplementary gear like external paging systems, door access control units, emergency panels, and video intercoms can now be tackled:
Run additional cabling from PBX to these devices as needed
Program unit settings on both the PBX side and endpoints
Register devices onto PBX system
Configure ancillary behavior within PBX software (e.g. paging groups, emergency notifications, door unlock settings)
Thoroughly test integration end-to-end
Don’t cut corners here or seemingly small issues like faint overhead announcements can persist.
Step 6: Documentation and Training
With the PBX system fully encompassing telephony, paging, security, and other solutions, the finishing touches involve:
Creating an up-to-date network diagram noting all hardware and connections
*Generating detailed extension lists/phone guides for personnel *Crafting user-friendly handset reference instructions
Developing operations/troubleshooting manuals for admins
Running system training sessions with employees
Doing this vital documentation and education piece reduces confusion down the road as employees become accustomed to new workflows and responsibilities arise. Be sure to identify PBX system champions across departments too.
With that, congratulations – your shiny new PBX setup is complete! Pat yourself on the back before beginning system optimization and inevitable future expansion needs.
Advanced Features to Explore
Beyond core PBX capabilities, a wealth of advanced features exist that can take your system to the next level while future-proofing:
Unified Communications
Unified communications integrates different digital channels like voice, video conferencing, instant messaging, SMS, and call control into one seamless interface. Microsoft Teams and Cisco Jabber are popular platforms. This simplifies cross-team collaboration and provides flexibility around remote work.
Call Reporting
Sophisticated call reporting gives visibility into call traffic, allowing smarter decisions around staffing, upgrading trunk capacity, identifying pain points, and more. Reporting requires integrating analytics modules onto PBX.
IVR Integration
Integrating interactive voice response (IVR) tools with PBX unlocks more sophisticated auto-attendant and routing functionality via spoken dialogues tailored to your environment. This improves customer experience and contains costs related to live operators. Open-source options from XiVO and Issabel provide a starting point.
API Capabilities
Leveraging PBX application programming interfaces (APIs) enables custom integrations with surrounding tech stacks – think customer relationship management platforms, payroll systems, resource planning tools and so on. The sky’s the limit.
While seamlessly interweaving these types of advanced applications takes time beyond initial PBX installation, the long-term benefits can transform operations.
Troubleshooting Common PBX Issues
Despite best efforts, PBX systems can occasionally run into problems ranging from tricky configuration quirks to failing hardware. Here is a quick troubleshooting guide covering common scenarios:
 No dial tone across system
Potential root causes:
Power or internet outage impacting PBX unit and connected equipment
Faulty trunk line connection
PBX registration server failure
Calls dropping or distorted speech Culprits here include:
Network connectivity issues like low Wi-Fi signal for wireless phones
Struggling PBX appliance due to high call load
Insufficient internet/trunk bandwidth
Extension registration failing
If phones can’t register with the PBX unit, suspect:
Incorrect credential or IP settings entry
Outdated or corrupt PBX firmware version
Port connection problems on Ethernet network
Ancillary systems like paging not working
Double check cabling from PBX to endpoints
Revisit unit configuration settings on both sides
Flaky power supply to peripheral devices
Methodically verifying connections and configurations typically reveals the gremlin. Initialize reboot sequences as a last resort. Logs on the PBX management interface telling registration and call handling errors provide diagnostic clues too.
For intricate faults, engage PBX vendor engineers before assuming hardware failure and contemplating replacement.
Final Takeaways
Constructing a PBX environment requires careful planning akin to enterprise Wi-Fi deployment – but you emerge with an invaluable unified communications hub tailored to your needs versus off-the-shelf solutions.
Patience and diligence in testing ensures each facet functions properly before going live. Future enhancement then becomes a bonus rather than a necessity. With a sound PBX foundation implemented, your organization is ready to communicate and collaborate at new heights.